Thursday 24 November 2016

Challenge accomplished.....not just one, but two :))

Thank you for appreciating my Temari work :) I am glad to share that I have completed two challenges and one you might guess is the Japanese Temari ball :))

Here is what I have done on the other side of the ball


I have deliberately chosen contrasting design patterns and colors because I wanted to try everything in one ball . To see the bottom part of embroidery , check my previous post here

In the centre design , I added golden border and golden beads

Click here to see how to work on shapes . I have done layered square shape with same herringbone stitch . The links that I am sharing are not the exact patterns but will give some ideas to start with . Apart from this , I also referred to the book 'Temari Techniques' by Barbara B. Suess

I have worked only the basic levels of Temari and even then it has created a beautiful effect . There are many wonderful and challenging designs if you search on the internet .

I had challenged myself to read 24 books in the year 2016 and I have completed that last week :)

Screenshot from my Goodreads
There were all kinds of books and the non-fiction ones took lot of time to read . I will continue with the same count next year .

On the cross stitch front , I am both excited and bored with the ladybird fairy, excited because it is nearing completion and bored because there so many ladybugs which means lot of work .
This is an incomplete lady bug . Each one will have 7 color shades and a bead :(
And with less amount of space for ending thread on the back side , it is becoming thicker like a real ladybug .

For most of my blogger friends who are celebrating ,

Happy Thanks Giving !!
Have a great day and weekend!
Preeti :)


Thursday 17 November 2016

Temari Challenge week 2...going great!!:)

Thank you for following my Temari challenge progress this November :)

My progress after the 2nd week 

Japanese Temari balls challenge

This type of embroidery pattern is known as 'Kiku' in Japanese meaning Chrysanthemum . It is made with layered Herrigbone embroidery stitch called as Uwagake Chidori  . Click on the links to see the pattern and stitching tutorial .
 
The beginning : Pins marked at a calculated distance between North pole and equator of the ball 

Embroidery in progress

Layered pattern formed as the embroidery rounds increase

On the centre/equator , also known as 'Obi' , I stitched solid square shapes with the same stitch . These solid shaped patterns are also commonly used in Temari balls


I have started using Kreinik metallic threads on my Ladybird fairy and I am enjoying working with it.


My first ever chilli grown at home :) I always had failed attempts due to flower drop problem

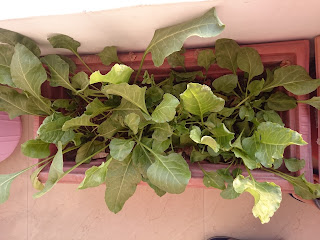
My spinach keeps growing big and giving steady harvest twice a week .


Hope you enjoyed seeing my Temari progress pics .

When I wrote my post today , I found a google notice about cookies notification as per EU laws . I don't even remember whether I disabled it years back while designing my blog . When I checked with my country domain , I did not see any notifications . Anyways , I have no energy to analyse it right away and make any changes but if anyone has come across it or know about any tutorial on what needs to be checked/done , then do share it .

Have a great day!
Preeti :)

Tuesday 8 November 2016

Temari challenge - Week1 and few more updates :)

As you all know I decided to take a challenge to learn a new craft and dedicate an entire month towards it, this is where I am at the end of first week of November with my new craft - the Japanese Temari ball .

Temari ball

I have a book 'Temari Techniques' by Barbara B. Suess and I am also learning from the website TemariKai . Below is the process I followed to make the ball , enlarge image to see the text . 
Looked a happy red ball of circumference 25 cms. until I started poking pins to mark the points . Many thread loops came out and then I understood that I should wind it more tightly . I did one more round of covering with a single sewing thread . I had to be careful and slow because fast and tight winding could have cut my finger . My ball then got reduced to a firm 24 cms in circumference . 
Some mathematics is involved in creating the guidelines on which the embroidery is done . I started with an intermediate level of S16 division . The ball is divided into Longitudinal lines and an equator which is called as 'obi' in this craft .  

When I was 90% done with my guidelines marking , the metallic thread frayed and broke :( So I used Anchor pearl cotton thread in golden shade . Since the ball is small so I am going to embroider it with Anchor pearl cotton threads .

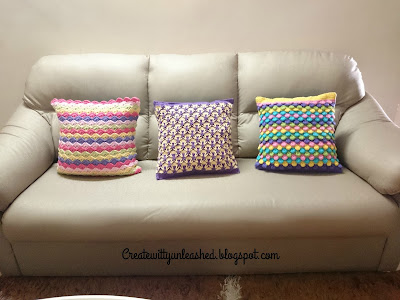
As promised earlier , here are few images of my cushions together 


These are the cross stitch projects I worked on last month .

Height chart :- I managed a good amount of negative progress - truncated a large chunk of tree :((((


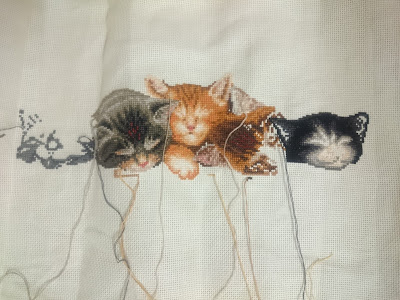
Dimensions Kitty Litter :- Almost completed the black cat on the extreme right and started a new grey one on the extreme left . I planned to complete this project on my last Birthday but seems it might even take another birth to complete :)


Ladybird fairy :- Worked on the skin part , it will look better after back stitching .


Thanks for seeing!
Happy crafting!
Preeti


Wednesday 2 November 2016

Longest crochet cushion :))

Thank you for your wishes on my last post !! :)

Sharing the longest crochet cushion I ever made --  4 ft x 1 ft 


Longest crochet cushion
I made it for Anshita's window sitting area and it took almost two years to complete ; not because of the size , but I got hooked onto other projects . My earlier idea was to make it a day and night cushion having back side as embroidered day scene but who has got the time to turn it over twice a day so I just made it a starry night cushion :) I made a matching satin blue cushion to attach the front crochet part . I used Anchor knitting cotton and 2.5 mm hook , the square pattern is from here .

On Diwali evening, Anshita made this Rangoli (a drawing made with fine sand like substance using pinch by pinch) all by herself this year :) Apart from the legend I mentioned in the last post about Diwali, we worship Goddess of wealth , Laxmi and we make Rangoli(s) outside the main door as a symbolic welcome to her .

I had completed one more large cushion , 24"x 24" , last year . I attached it onto fabric cushion last week . You can see my other large size cushion here .

Large 24 inches crochet cushion
It is a simple mitered pattern made with  Lily sugar n cream solid and variegated yarns and 4.5 mm hook .


I have started working on my challenge of making Japanese Temari ball this month . The first week is dedicated to searching tutorials and gathering material . I will post the beginnings in my next post .

Hope you are having a great week!
Preeti


Related Posts Plugin for WordPress, Blogger...