
Thank you for following my Temari challenge progress this November :)


I have started using Kreinik metallic threads on my Ladybird fairy and I am enjoying working with it.



When I wrote my post today , I found a google notice about cookies notification as per EU laws . I don't even remember whether I disabled it years back while designing my blog . When I checked with my country domain , I did not see any notifications . Anyways , I have no energy to analyse it right away and make any changes but if anyone has come across it or know about any tutorial on what needs to be checked/done , then do share it .
Have a great day!
Preeti :)
My progress after the 2nd week

This type of embroidery pattern is known as 'Kiku' in Japanese meaning Chrysanthemum . It is made with layered Herrigbone embroidery stitch called as Uwagake Chidori . Click on the links to see the pattern and stitching tutorial .

The beginning : Pins marked at a calculated distance between North pole and equator of the ball

Embroidery in progress

Layered pattern formed as the embroidery rounds increase

On the centre/equator , also known as 'Obi' , I stitched solid square shapes with the same stitch . These solid shaped patterns are also commonly used in Temari balls
I have started using Kreinik metallic threads on my Ladybird fairy and I am enjoying working with it.


My first ever chilli grown at home :) I always had failed attempts due to flower drop problem

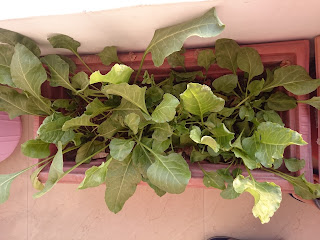
My spinach keeps growing big and giving steady harvest twice a week .

Hope you enjoyed seeing my Temari progress pics .
When I wrote my post today , I found a google notice about cookies notification as per EU laws . I don't even remember whether I disabled it years back while designing my blog . When I checked with my country domain , I did not see any notifications . Anyways , I have no energy to analyse it right away and make any changes but if anyone has come across it or know about any tutorial on what needs to be checked/done , then do share it .
Have a great day!
Preeti :)


