Showing posts with label Stitching. Show all posts

Monday, 5 January 2015

Messy to Classy link party !!!!!

Thank you, my dear friends, for your wishes on my last post about my published piece in the magazine :)

Few days back, I mentioned here about my plans to start a link party on reorganizing/arranging your craft spaces. After getting your feedback and great tips from my blogger friends about link parties, here I am ready with my introductory post.

Messy-to-Classy link party for craft spaces

It took me some time to learn about linky widget and creating grab button etc. I have added a tab on the menu bar, extreme right, where I have given information and signing up details. 

Please click on the tab or click here to sign up for the party. If you want me to add any more details, please let me know.

Let the ideas pour in :)
Thank you for visiting !!
Preeti 


Tuesday, 7 October 2014

But I can sew .........

What if my finger doesn't allow me to stitch and crochet, I can sew . At the first place, I got hurt with sewing machine and the irony is that I can, in this situation, work with sewing machine only . The hurt is not that bad but at the wrong place ----tip of index finger of my right hand . While sewing, I heard a sound and thought that the needle has broken. To check that, I touched the needle tip carefully with my finger but accidently pressed the foot pedal and the needle poked my finger. It pains when I hold a pen or any needle . So I am sewing these days.


I made this printer cover . A long pending task which I avoided because the box type cover was a bit intimidating for me .

printer cover

This medium weight fabric was in my stash for the past 8 years with which I had planned to make a skirt for Anshita.

What else, I was able to put floss on more bobbins and I filled both the boxes.


Then, I completed sewing the cushion covers on which I am going to attach (hand sew) the crocheted pieces. I made 5 covers sized 16"x 16" and 2 covers measuring 24"x24"


The left ones are the smaller ones. The printed side will be on the back and the crochet piece will be attached on the white front.

I am in the process of arranging my craft room, will share the pics. Right now, the soft boards are being used for miscellaneous household bills. Above few pics are from my craft room.
 
Have a crafty week ahead!
Preeti :)


Tuesday, 17 September 2013

A Lining Stunt !!!!! ;))

I call it a stunt because I did it on my sewing machine ;) I am still a beginner as far as sewing on a machine is concerned.
I made a purse/bag for Anshita which was pending for lining for around 5 months. She raised an alarm last month to complete it because she wanted it for her school field trip to a museum.
Two weeks back, in a hurry, I had spent full day to put the pieces of purse together and adding a lining to it. I tried taking pictures to form a tutorial. This is my first tutorial on sewing. After initial ramblings, most of them are simple step-by-step images. Hope I make some sense.

Few assumptions to keep your expectations low:))
1. Tutorial by a beginner who doesn’t get her stitches straight on a sewing machine
2. The tutor is scared of pins so runs through the edges roughly
3. The tutor is a bad photographer
4. She is at times wrong in assessing measurements and does end up with few adjustments.

To begin with, let me state that the purse is closed on sides and open from top to bottom. I have used the waterproof lining material which I had won on Rajeswari’s giveaway. I liked working with it :)

Take a rectangular lining piece that would cover the entire inside of the purse lengthwise. I have joined two pieces. Take another small rectangular piece for bottle cozy enough to cover the circumference of a bottle at the bulkier part. Take an inch extra on both sides for the seam and to attach it to the main lining piece. Here, I ended up with slightly bigger bottle cozy and did an adjustment while sewing.

Createwittyunleashed.blogspot.com:lining tutorial


Createwittyunleashed.blogspot.com:lining tutorial
Attach the cozy in the center of main lining piece facing right side.
Click on image to read instructions
 
Createwittyunleashed.blogspot.com:lining tutorial
I didn't have a plain elastic, so I used the one with a frill and hand sewed it on the front by stretching the elastic to cozy's length. If you are using a plain elastic then hand sew it from inside. Add on both top and bottom.

Createwittyunleashed.blogspot.com:lining tutorial
Create a pocket
 
Createwittyunleashed.blogspot.com:lining tutorial
Attach it from the front next to lining (either left or right )


Createwittyunleashed.blogspot.com:lining tutorial
Looks fine, right?

 
Createwittyunleashed.blogspot.com:lining tutorial
Fold the main lining piece from the center.  

Createwittyunleashed.blogspot.com:lining tutorial
and sew the other end

Createwittyunleashed.blogspot.com:lining tutorial
turn inside out, this is how it will look with bottle cozy in the corner of purse to hold the bottle firmly

Createwittyunleashed.blogspot.com:lining tutorial
put it inside the purse.

I will show the purse in next post in couple of days. This tutorial has made me realize that writing tutorials is not an intimidating task . Just that while writing tutorial, you must not look before or after into the kitchen ;)

Have a nice day!
Preeti :)


Monday, 28 January 2013

And POP! Comes out my heart !! : )

Better late than never!!
This Valentine post comes a bit late . I wanted to share a Valentine gift I earlier made for Raj : ) I cannot share about the one I am making for this year.

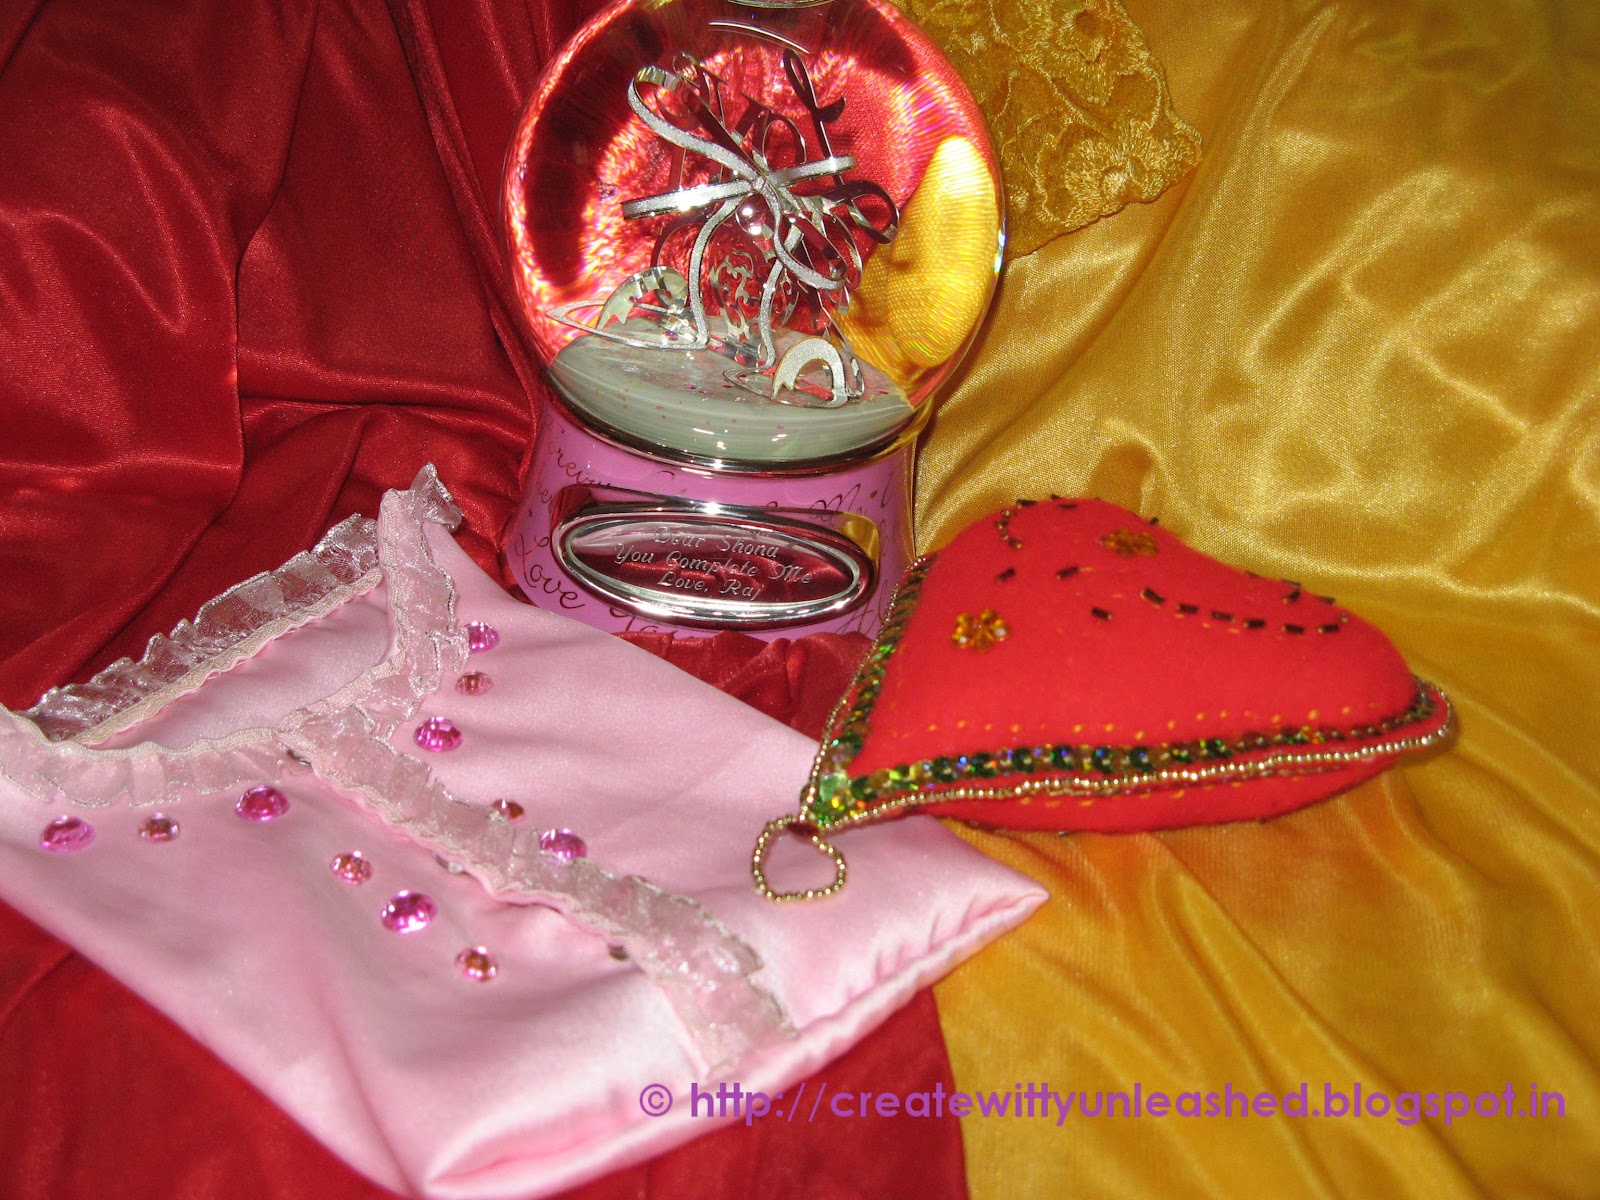
When he received this one , he thought that the cover is nothing but an envelope/case , a similar one which I made for his fabric Birthday card. I had to tell him that this is my satin top/gown with buttons ; ) Annndddd, when you open, POP! Comes out my heart for you!!! : )
No idea, whether he really was naïve to understand it or was he still thinking about office when I gave him . Anyways , I magnanimously forgave him that day for being unperceptive about my creativity : )

Embroidered Valentine Felt heart1

Embroidered Valentine Felt heart2

Embroidered Valentine Felt heart3

Embroidered Valentine Felt heart4

Embroidered Valentine Felt heart5

Embroidered Valentine Felt heart6

Embroidered Valentine Felt heart7


The heart is made of felt fabric and the cover, with a satin fabric ; sprinkled few embellishments : some stitched , some glued !! This is my first ever and so far the only one , felt project . The snow globe in the picture is a gift Raj got for me from one of his visits to San Francisco. It has a personalized message for me inscribed on it.

I usually end up in loss for the month of February . My B’day is on 13th Feb , 14th is Valentine day and on 17th Feb , is our wedding anniversary . While I get gift on my B’day , Raj expects other two gifts from me!! Sometimes we end up without any gift on Valentine day . On Wedding anniversary , we go together and buy a common gift . Not a bad deal I guess : )

Isn’t the gift romantic? Definition and expression of romance & love changes as we move ahead in life. Every stage of life has its own pleasures : )

Happy week ahead !!
Do write in !

Preeti : )
 

Tuesday, 11 September 2012

Maharani ki Jai ho! Stitch Magic !

Maharani ki Jai ho! Stitch Magic !

Here comes one of the treasured outfits of my precious little Maharani.


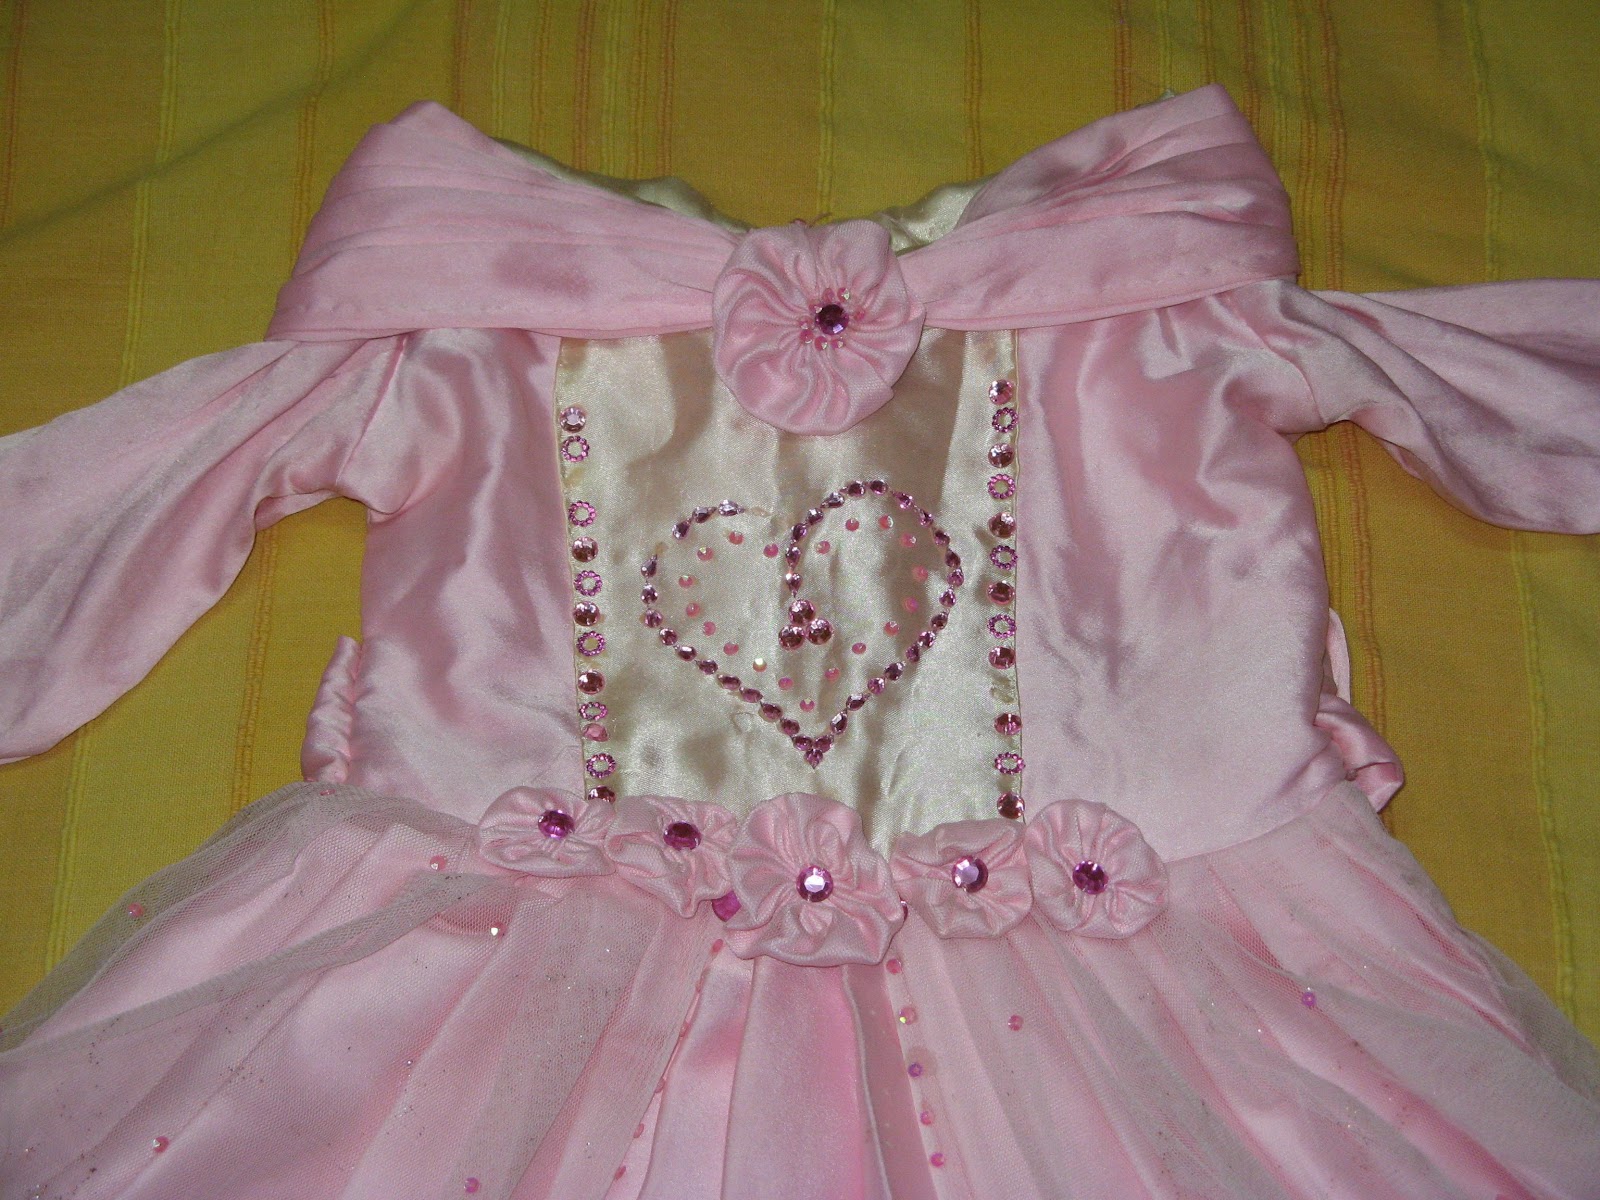
I stitched this full length Princess frock/gown for my daughter five years back when she was four. It took me four months to complete as I worked on it only on weekends. I wanted to complete it on her 4th birthday, but missed by a month:(

There are 2 reasons why I treasure this: One, I made this when I was a full-time professional working on it in bits and pieces on weekends; the other, I did not own a sewing machine at that time so the entire dress is hand sewn by me :)


It is made of pink satin fabric with a similar shade colored net fabric on the skirt. The flowers are made of same fabric. I glued sequins on the top part and on the net fabric. Some of the sequins have come out now as it might have gone through 10-15 hand washes. I just rubbed the pink fabric glitter with my fingers at random places on the net to give it a sparkling effect. Not that much visible in photo but it used to glitter when she moved around:))


And do you know the spread or circumference of the skirt? A whopping 3.5 meters! Quite heavy for a four-year-old, right? But the satin was of fine quality and light weight so it wasn’t that heavy for her. In fact with this dress, she managed to play on the slides too in a park adjacent to a marriage function hall!

Hope you enjoyed the royal treat!

Warm regards,
Preeti.
Related Posts Plugin for WordPress, Blogger...